Claude Video Editing Just Became Unrecognizable
Search inside any video
SavedThat transcribes your saved videos and lets you search across all of them instantly. Save this video and find any moment.
TL;DR
Learn how Claude automates video editing from trimming to adding motion graphics, making it accessible for anyone to create polished videos effortlessly.
Chapters
Transcript
Claude is now editing my videos end to end. All I have to do is drop in a raw file and it is trimming out the mistakes and the dead space. It's adding motion graphics you see over here. It's adding dynamic elements you see over here. It can even add subtitles at the bottom of the screen you're looking at here. So, even if you've never coded before or you've never edited videos before, I'm going to
you've never coded before or you've never edited videos before, I'm going to show you guys exactly how you can get set up and get outputs that look pretty incredible just this. All you have to do is use your natural language. It is so insane. Don't want to waste any of your guys' time. So, let's just get straight into the video. So yeah, I was able to take this, , 50-second
able to take this, , 50-second clip, drop it into Claude, and then it cut out all of the mistakes, all of the filler words, and now we have a 27 second clip with all of the motion graphics that you guys just saw. But not only that, you can see we also have this timeline editor, which has all of the actual elements down here, all of the
timeline editor, which has all of the actual elements down here, all of the different motion graphics. So if I wanted to, I could delete these, I could move them around, and I could change the timing because obviously what's super important about motion graphics is the timing. So now we have this actual interface within our Hyperframes dashboard to make some really quick iterations. So today I'm going to show
iterations. So today I'm going to show you guys step by step setting up a fresh Cloud project. We're going to get everything we need to get installed and by the end you're going to know exactly how to edit videos just you saw in the intro. All , so before we get into it, let's talk about the way that this works and the tech stack that we're using.
the way that this works and the tech stack that we're using. So before we were able to use Claude and these other tools to edit videos, this was my process. I would have some raw file, which would be a recording, and then I would go in there manually into, , Adobe Premiere Pro and I would trim out all of my mistakes and I would trim out all of
my mistakes and I would trim out all of the retakes and things that. And this was all very manual. So, I was doing this manually and I was doing this manually. And then if I wanted to add any animations, I would be doing that manually. And then rendering is not a big deal, but I would be doing that manually as well. And then a few days back, this tool from Hen just dropped
back, this tool from Hen just dropped called Hyperframes. And I made a video about how we're able to use Claude with hyperframes to get motion graphics and animations this. And what I showed you guys in that video was us doing these first two pieces manually, but then we were using Hyperframes to do the animations and the
do the animations and the rendering. So, still a huge productivity boost, but we were still manually doing the trimming and the editing. But now we're taking it a step further because we have this new tool called video use. and video use is going to be the one that's doing the trimming and editing
and video use is going to be the one that's doing the trimming and editing for us. So, now what we're doing is we're dropping in a raw file and then it's being trimmed, edited, animated, and rendered for us and it's really cool. Now, yes, we could get rid of the manual step of recording the raw file. I don't want to do that for YouTube because I want to keep these
file. I don't want to do that for YouTube because I want to keep these videos real, but I did make a video about that as well. In this video, I talked about how I used Hey Genen to automate me recording the videos. So, I would drop in a script and then it would give us the raw file. So this step would change to a
this step would change to a hijen avatar and then because the fact that the hijen avatar is perfect, we were able to just remove this trimming and editing step entirely and then we would just get the animations and the rendering done. So there's lots of ways that you can skin the cat here, but today what I'm showing you is just manual recording and then
just manual recording and then the rest from there is taking care of us. And I said, I'm going to show you guys the step by step. And of course, at the core of all of this, we're using Cloud Code as the orchestrator to connect all these different tools together. Don't be scared by the word Claude Code. I'm going to show you how this works. It's super simple. So, today I'm going to be
going to show you how this works. It's super simple. So, today I'm going to be showing you guys how to do this with the desktop app of Claude Code. here, you can see this is what VS Code looks , which I've shown in a lot of my previous tutorials. I'm not going to use it today, but that is usually the main way I to use it. Today, we're going to be using the claw desktop app just because the interface might feel a
because the interface might feel a little less scary. Also, funny, when you search Cloud Desktop app, at least now, Codeex pops up. But anyways, you're going to install the claw desktop app. You can see you would go to this cloud download page and just download this for your operating system here. Now, once you open that up, it's obviously going to prompt you to sign in. And because we're using Cloud
it's obviously going to prompt you to sign in. And because we're using Cloud Code, you do need to be on a paid plan that has access to Claude Code. So then what you're going to want to do is you're going to choose a folder to work in. So you could come in here, open a folder, and just choose a brand new one. It can be completely empty, and you'll be all good to get set up. Or what you could do is you could go over to my free
be all good to get set up. Or what you could do is you could go over to my free school community. The link for that is down in the description. And you could grab this Hyperframe student kit. And all you need to do from here is you need to just grab the URL of this and give it to Cloud Code and say, "Hey, clone this repo. Set up this project for me." just this. I said, link for this is
this. I said, link for this is in my free school community. Okay, but let's say you don't do that. What are the other tools you'll need? Well, I'm also going to attach in the description of this video this Hyperframes GitHub repo and the video use GitHub repo. A GitHub repo is just a project. It's a collection of folders and files
It's a collection of folders and files and Claude is able to look through this and pull in the elements that it needs. So, all you would do is you would copy this link, go into Cloud Desktop, just paste it in, and then I'm going to go grab the other one as well for video use. And I'm going to paste that in. And I would just say, "Hey, I'm
that in. And I would just say, "Hey, I'm setting up this project to be my video editing studio. So I want you to look at these two GitHub repos and I want you to pull in the skills and pull in the important information that we need from these so that I could give you a raw video file and you would be able to edit it, remove the
you would be able to edit it, remove the filler words, and then help me add motion graphics to it." So the full pipeline. And then you just go ahead and shoot that off and let it do its thing. Let it look through those and let it pull in any of the files that it needs. Now, while this is running real quick, you guys might be asking ,
quick, you guys might be asking , why do you prefer to use the desktop app over VS Code or vice versa? Well, typically for me, the reason why I VS Code is because I can see all of my files. So, this is my Cloud Code project, ? And over here, I can see my assets. I can see my projects. I can see everything that I've dropped into
see everything that I've dropped into here. Whereas in the desktop app, you don't have visibility. even though they're working out of the same folder, we just don't have that visibility because on the lefth hand side here, all we are seeing is our other projects that we could switch into. We don't get to see all the files. So anyways, you can see it says, "Okay, good news.
get to see all the files. So anyways, you can see it says, "Okay, good news. Almost all of this is already wired up. Everything's already set up because my project is already set up. So you guys can either grab the repos or you can just do this exact same prompt and it will set up everything for you because all we need is we need the skills from hyperframes and the skills
because all we need is we need the skills from hyperframes and the skills from video use and then we're just going to start building some videos here." Okay, so because that's already happened, I'm just going to go in here and I'm going to do a slash command, which means I'm just going to clear out this conversation so we can start fresh. Okay, so I recorded this video here. It's 50 seconds and it's
here. It's 50 seconds and it's just me blabbing about what we're doing in this video, but I purposely made a few mistakes. I left a lot of, , silences and filler words in here. And remember, this is 50 seconds long. So I dropped this into the project here, and I'm going to ask
project here, and I'm going to ask it to trim it for us. So in here, if I type the at sign, it will show all of the different things that are in this project. And here, if I go to the bottom, you can see we have edit demo raw, which is that video that I was just talking about. And so now it knows exactly what I'm referring to.
exactly what I'm referring to. And I'm just going to say, "Hey Cloud Code, I would you to use the video use tool just to edit this video. I want you to analyze it. I want you to remove any filler words or silences or retakes. And then what we're going to do after that is we're going to use hyperframes
that is we're going to use hyperframes to add the motion graphics to it. So your first task is just to edit out the mistakes and the filler words. Okay, cool. So while that's running, let me explain why we're doing it that way. Because I showed you guys, ultimately what we're able to do is completely automate this pipeline, but
completely automate this pipeline, but we have to work our way up there. And if we wanted to use video use to do everything, it could because within video use, there's a motion graphics skill called reotion, which you guys might have been familiar with already. And the reason why we're using
And the reason why we're using hyperframes over remotion is because we just it better. I'll show you guys a comparison in just a sec here. But what you could do is say, hey, run the full video use pipeline, trim, animate, and render. I don't want to touch anything. And it would do it. It would do it with Remotion. So, let me show you an example. So, if you guys remember the
do it with Remotion. So, let me show you an example. So, if you guys remember the intro to this video, we had these motion graphics. We had these liquid glass cards, and I thought this looked really, really good. We had this little, , animation there. I love this. This was hyperframes. Now, I dropped in that same raw video that you guys looked
that same raw video that you guys looked at here. I dropped in the same raw one into Cloud Code and I said, "Hey, do the full video use pipeline." And this is what it gave me when it used Remotion. Claude is now editing my videos end to end. All I have to do is drop in a RAW file and it is trimming out the mistakes and the dead space. It's adding motion
file and it is trimming out the mistakes and the dead space. It's adding motion graphics you see over here. It's adding dynamic elements you see over here. It can even add subtitles at the bottom of the screen you're looking at here. So even if you've never coded before or you've never added So you can see it trimmed it just fine because it went from 50 seconds to again
because it went from 50 seconds to again about 27. It added things this. It synced it up to the time that I was saying them. So it all felt good. But I just the hyperframes animations a little bit more. Real quick, I'll just show you guys a few other examples of what's possible. Here is Remotion. So it has a nice little background. It's got my face in the
Keep reading — 81 more segments
Sign in free to read the full transcript, save this video, and search inside everything you save.
Sign in to continue readingPrefer the original? Watch the video
Are you the creator or rights holder of this video? Request removal of this transcript.
Related Transcripts
 1:04Instagram
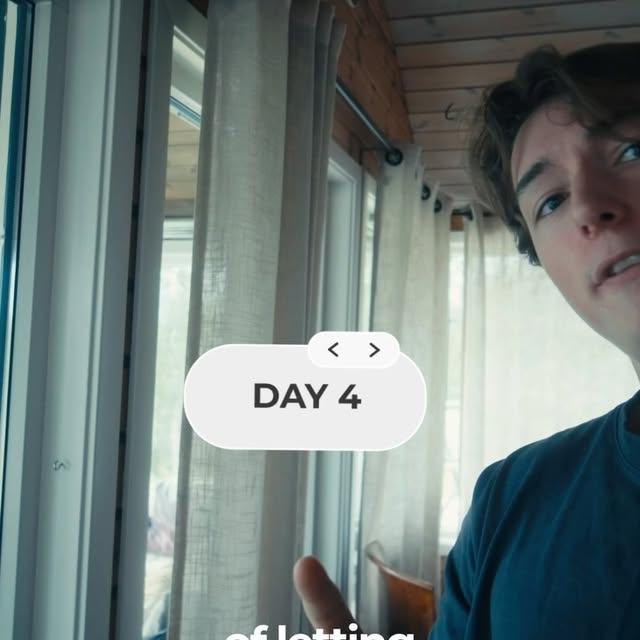
comment "edit" and i’ll send the breakdown over👇 Day 4 of letting claude code…
Johannes Forseth | AI Systems
 1:06Instagram
Editing has gotten a whole lot easier now that we can speak to edit out videos…
Jens Heitmann
 1:06Instagram
comment "Kallaway" and i’ll send the breakdown over 👇 Day 1 of recreating…
Johannes Forseth | AI Systems
 5:25YouTube
GPT 5.6 Sol Made This Entire Video
Nate Herk | AI Automation
 1:36Instagram
I just watched @nick_saraev use Claude Code to build a $10,000 production team…
softgirlnocode
 27:29YouTube
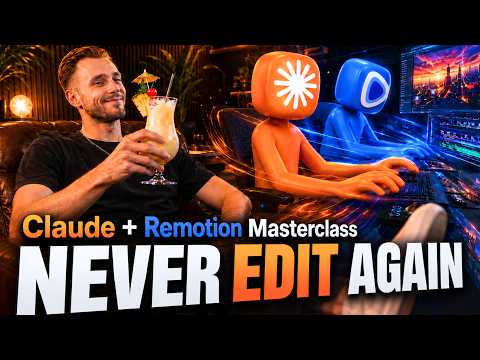
Claude + Remotion Just RETIRED video editors... (ULTIMATE REMOTION TUTORIAL)
Chronixel
Never lose a moment again
Save videos from YouTube, Instagram, and TikTok. Search across all your transcripts with AI-powered semantic search.
Start Saving Videos — Free Trial