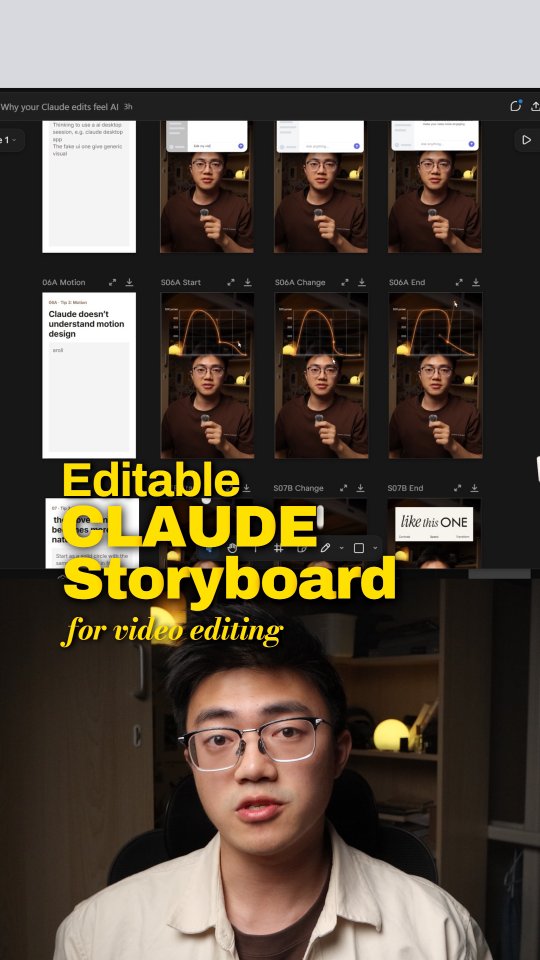
While I was making this video and building my little editors with Claude,…
Search inside any video
SavedThat transcribes your saved videos and lets you search across all of them instantly. Save this video and find any moment.
TL;DR
Learn how to create editable storyboards in Claude for video editing, including keyframes and layer adjustments.
Chapters
- 0:00Introduction to Editing with Claude01
- 0:10Creating a Storyboard02
- 0:20Editing Keyframes03
- 0:30Using Reference Images04
- 0:40Commenting on Elements05
- 0:50Finalizing Shots06
- 1:00Conclusion and Feedback07
Transcript
If you ever edited with Claude, the pain of describing the exact position or shape of an element. But you can get a fully editable storyboard directly inside Claude before it renders a single frame. If you go to Claude, then Claude code, then type something like, make a storyboard on a Figma style design canvas. Each shot has three keyframes so I can edit them before you render anything.
Use the photo I gave you as a role reference. Then you can get something similar like this, which is what I used for the last project. Besides a simple move, change color, or change the shape. If you click on the three dots, you can see all the layers and parameter, even the code it used to draw the element.
You can comment directly on the element, say something like change the text block to real text and hit enter. Cloud will work on it and it added all three blocks with text. And let's say if you're happy with the shot, you can box select here and type go make this shot and you can move on to the next shot.
And this workflow has bunch of other bonus, like describe the B-roll under each line of the shot or drag any reference image you like. This will allow you to get the full control of the video is what I say if I haven't tested in my project. Cause it's even trickier to tweak the motion you want. That's why for each element in each video, I also build a slider and curve for tweaking.
But I'm still testing, so you can let me know if I should make a part 2.
Are you the creator or rights holder of this video? Request removal of this transcript.
Related Transcripts
 28:15YouTube
Claude Video Editing Just Became Unrecognizable
Nate Herk | AI Automation
 1:04Instagram
comment "edit" and i’ll send the breakdown over👇 Day 4 of letting claude code…
Johannes Forseth | AI Systems
 0:31Instagram
comment “editor” to get free access!!
alex
 1:06Instagram
Editing has gotten a whole lot easier now that we can speak to edit out videos…
Jens Heitmann
 0:41Instagram
Comment Ai for the link.
Jo Mendes
 0:55Instagram
Drop “EDIT” below and I’ll send you my full walk through video on how I edit my videos with AI.
Justyn Berkovits | AI for Solo Founders & Entrepreneurs
Never lose a moment again
Save videos from YouTube, Instagram, and TikTok. Search everything that was said, and jump to the second.
Start Saving Videos - Free Trial